
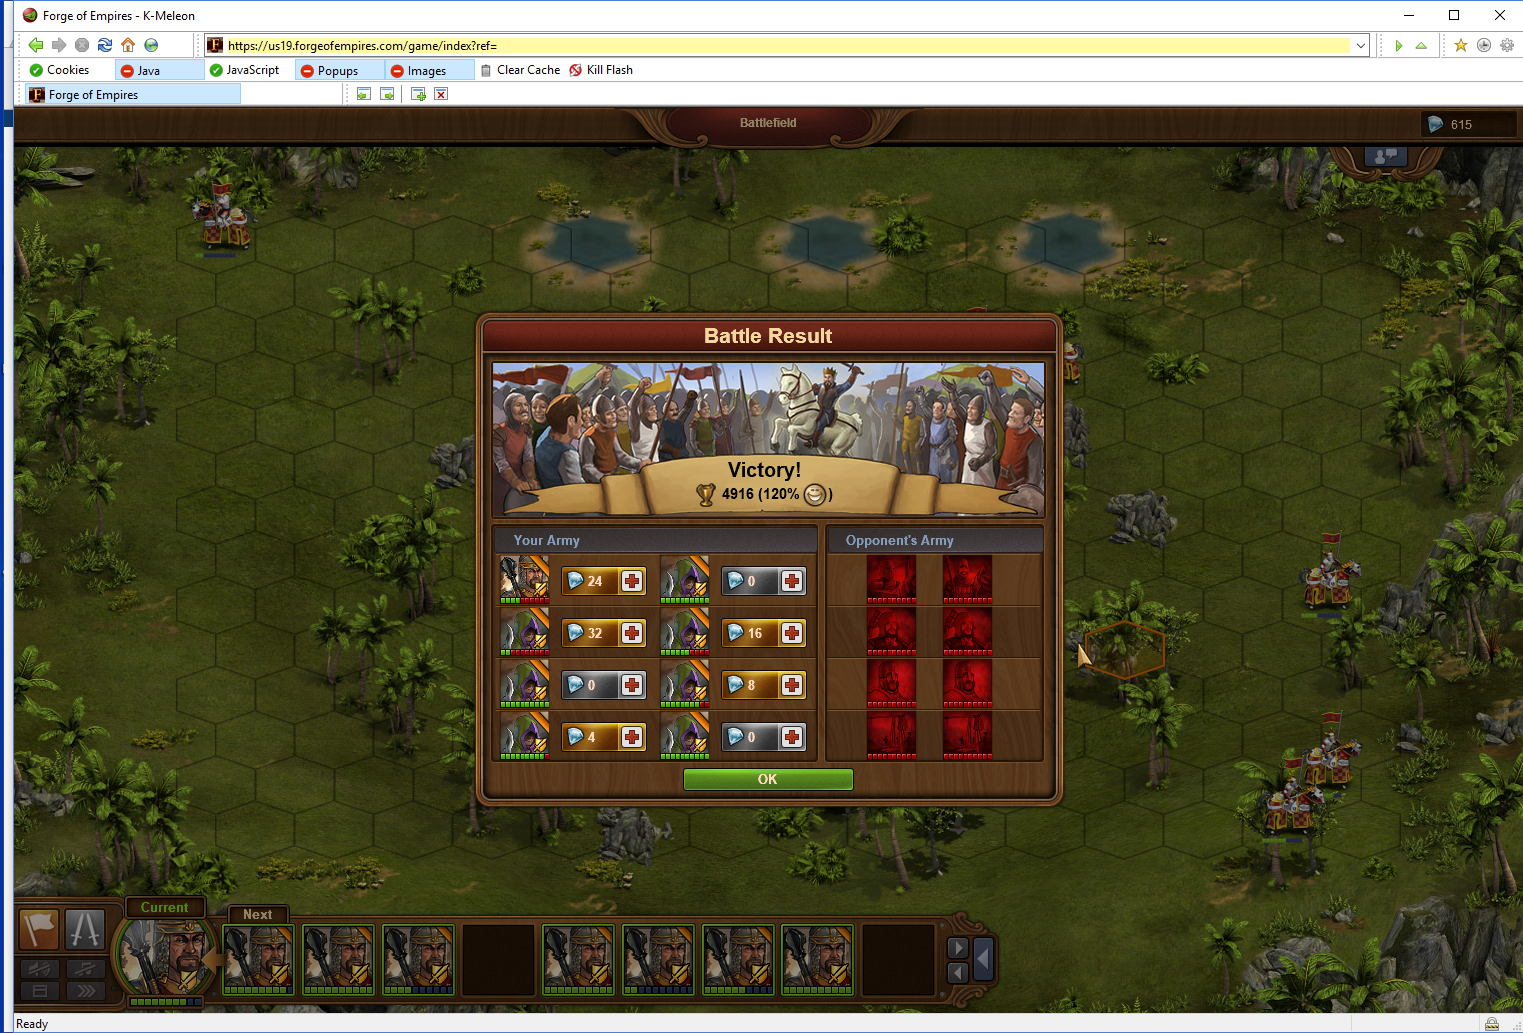
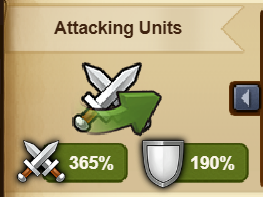
This is a 2 wave battle. My boost is 48/48 which is lower than the recommended amount for the age. The techniques outlined here will work for all battles LMA and lower. Even against Colonial and Industrial units, most of it is still useful.
Unit Selection
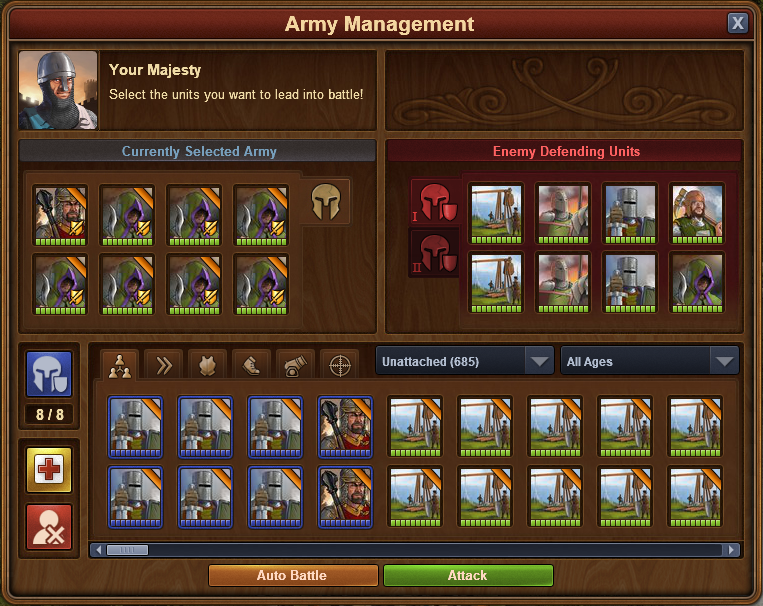
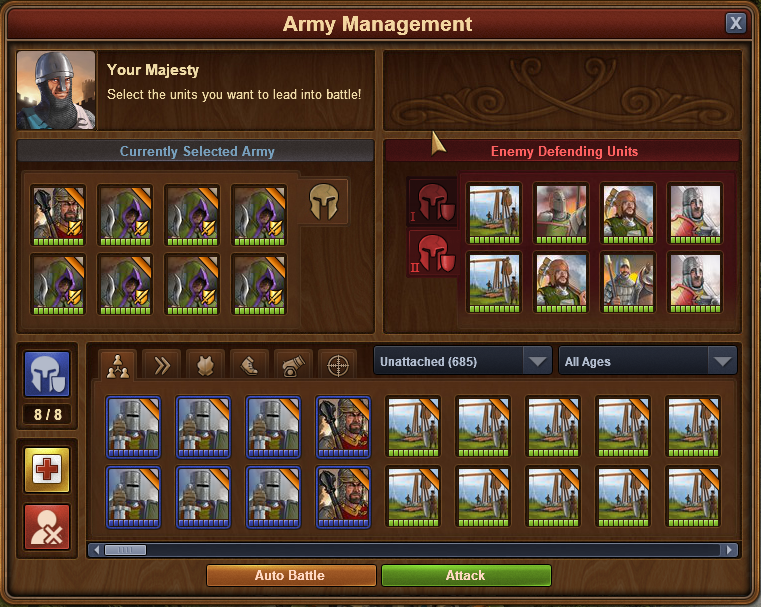
My general rule of thumb is with 2 or more artillery, I go with 1 fast, champ if possible, and 7 rogues. If less than 2 artillery, I use 1 heavy and 7 rogues. There are boundary conditions. The above AI lineup could be tackled with heavy+rogues. If my boost was any lower, I’d probably go with heavies because my fast would consistently take 3 hits to take out the AI light and heavy. At 48%, with champs, it’s going to be 2 hits about 50% of the time. For this example, I’ll use champ+rogues.
Approach
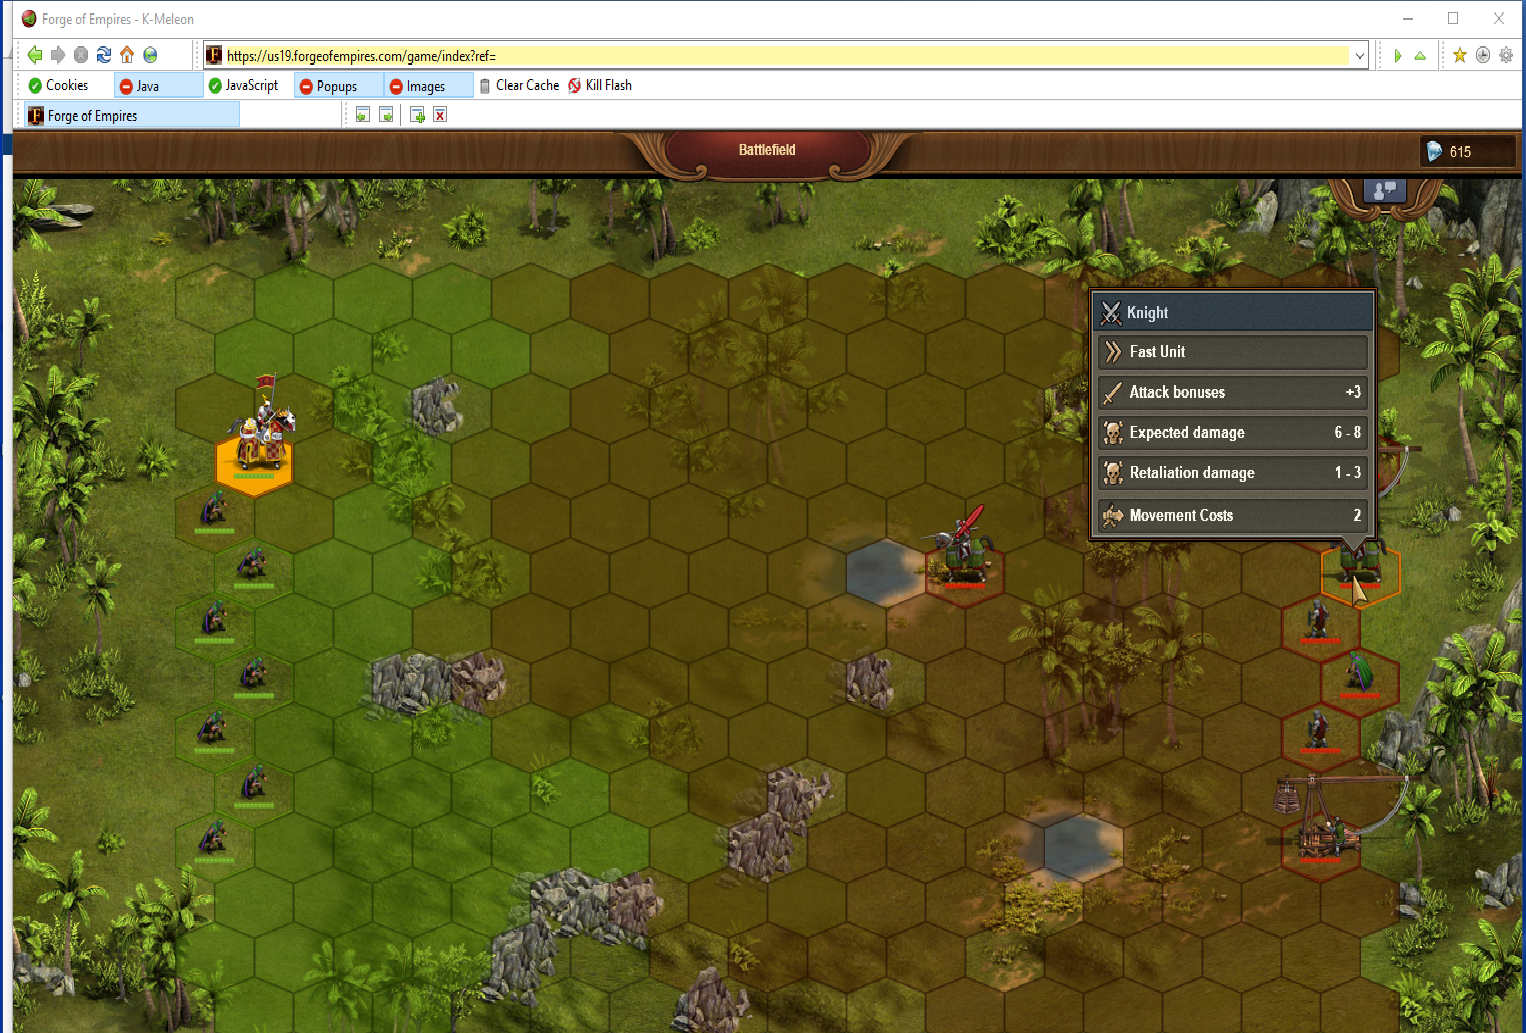
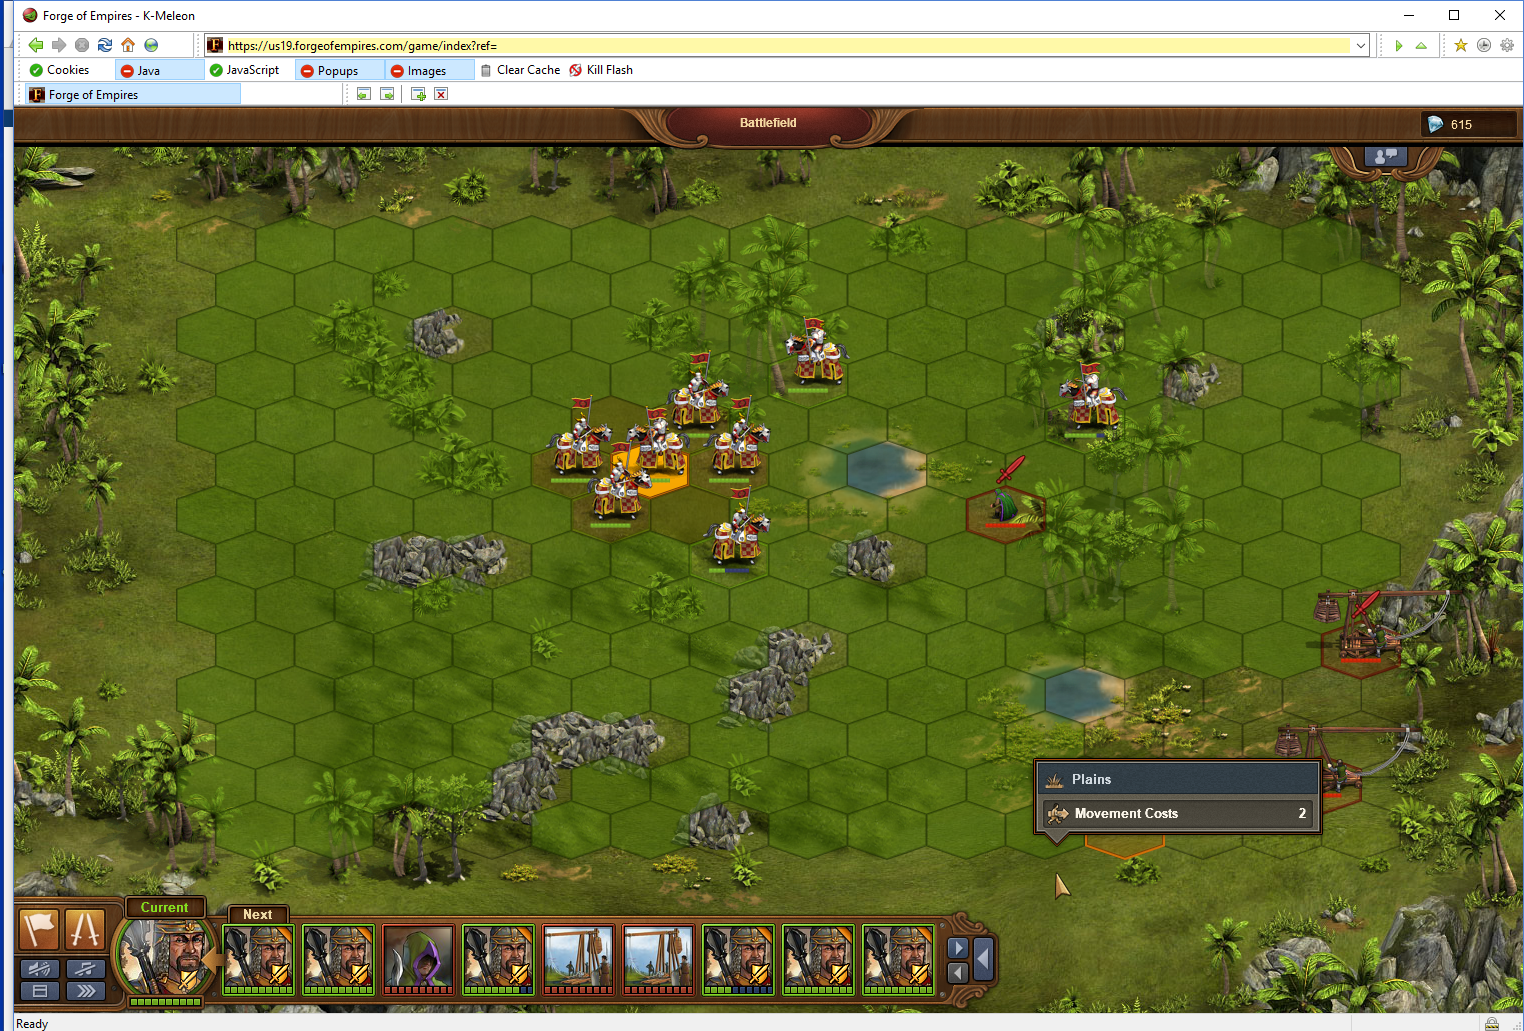
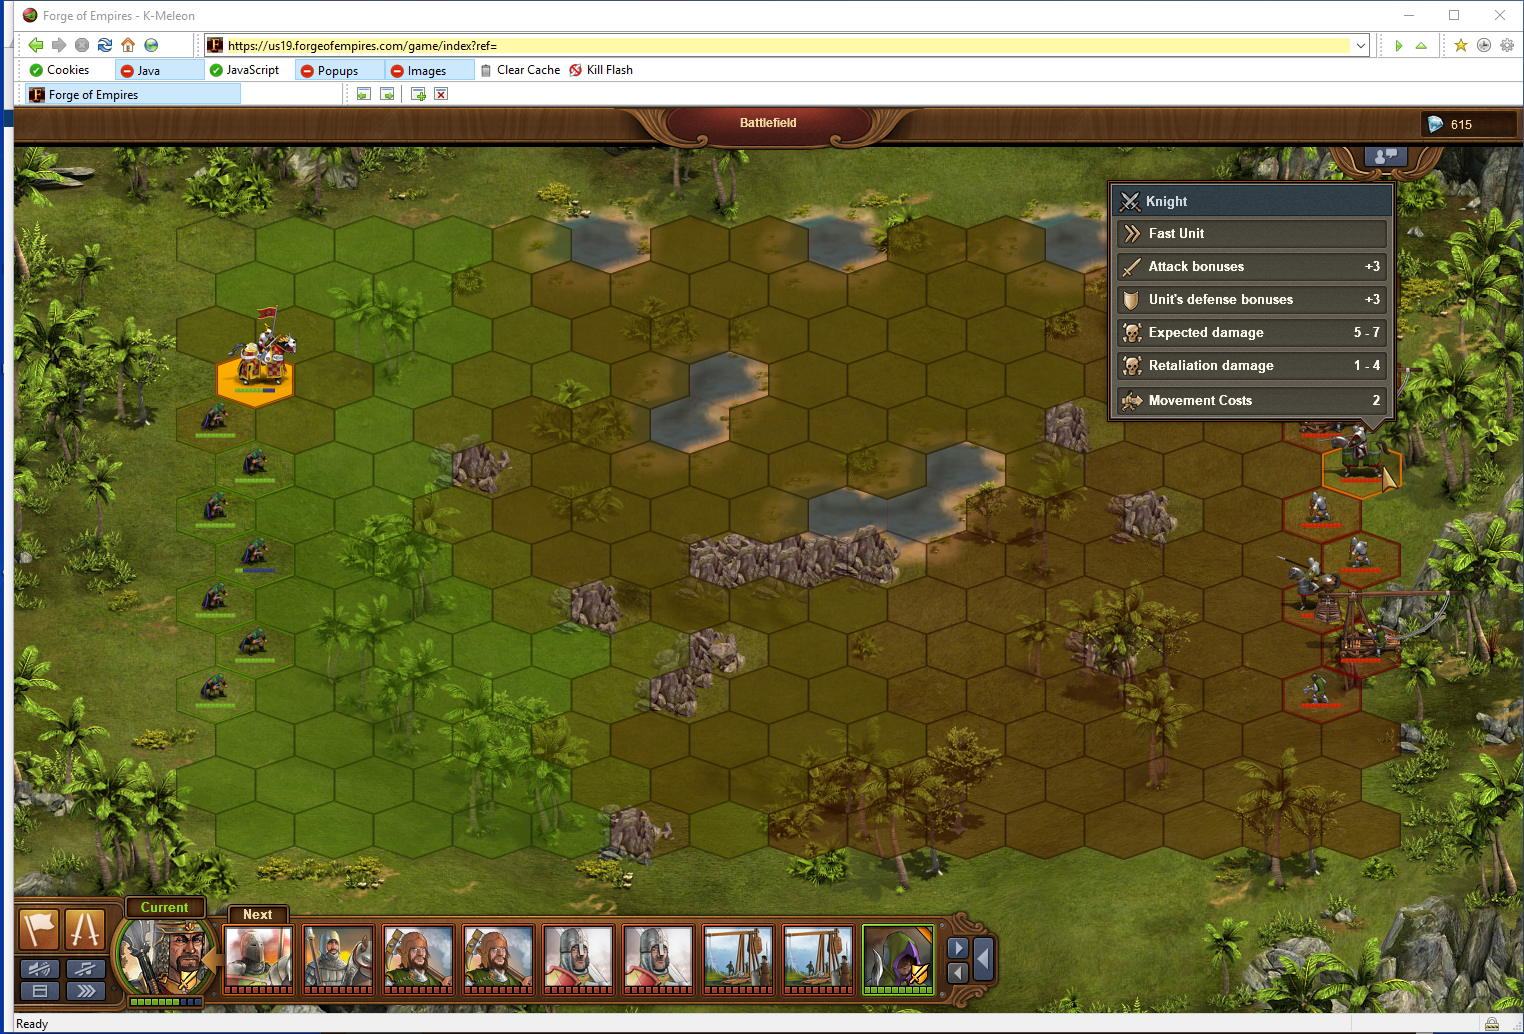
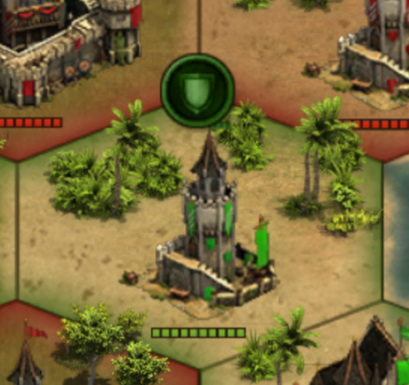
The general tactic is to use your rogues to absorb the treb and melee AI unit attacks while your units move across the battlefield and close with the enemy. The first thing to check is that all AI trebs can reach rogues. You do that by hovering over the AI unit on PC or clicking and holding on mobile. The darker shading shows where the AI unit can move and the lighter shading shows where the AI unit can strike. Sometimes because of terrain, both trebs will only be able to reach 1 or none of your rogues. If you’re just learning to battle, better to surrender and try again until the trebs can target separate rogues. The reason is that we want each rogue to take only one hit so it absorbs the blow but takes no actual damage. Also, we don’t want the trebs to go for the seed champ because it needs to survive this battle or we can’t do wave 2.
So assuming that trebs are covered, you need to check how far each of the enemy units can reach and place your Champ just out of reach. Usually, you only need to check AI fast and range.
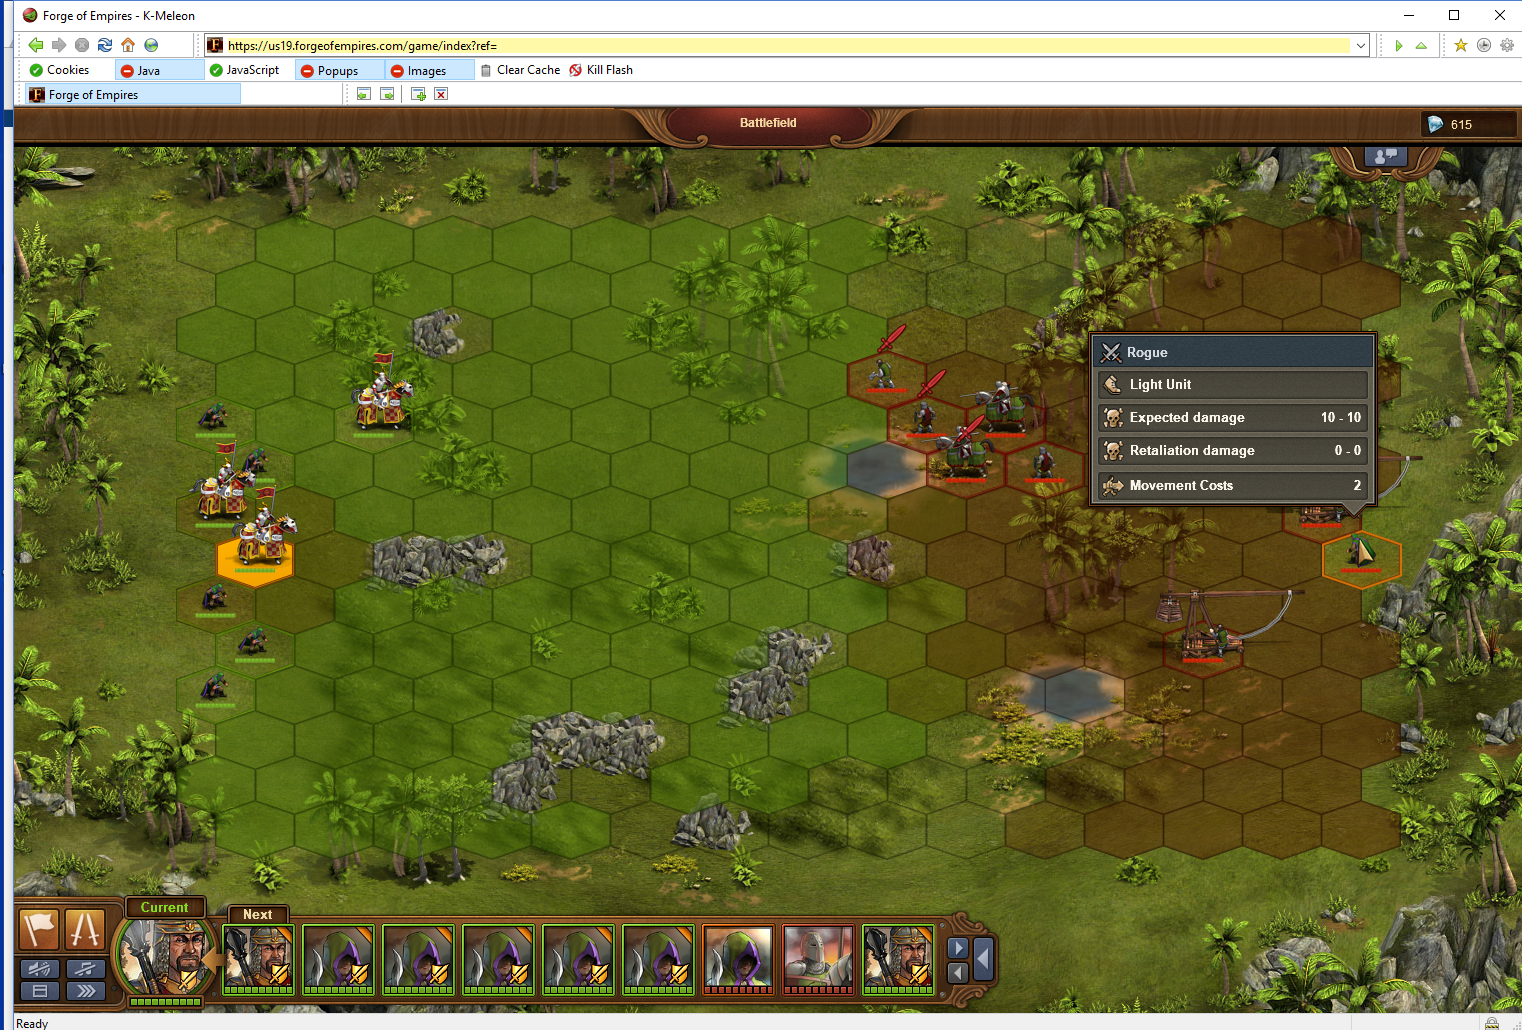
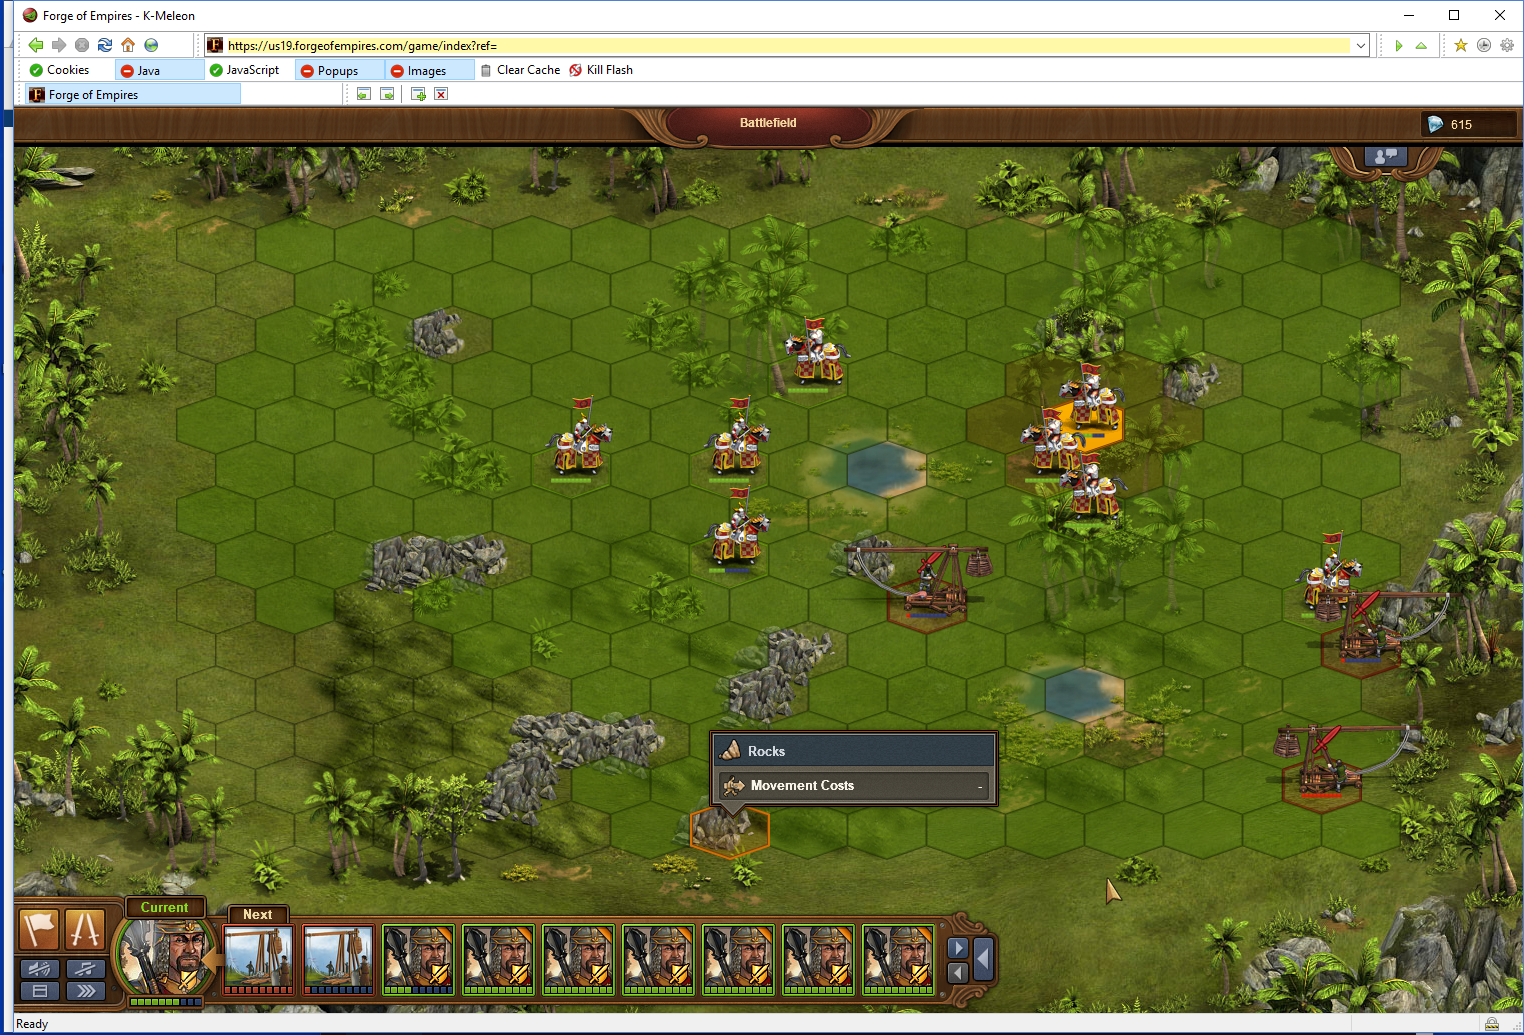
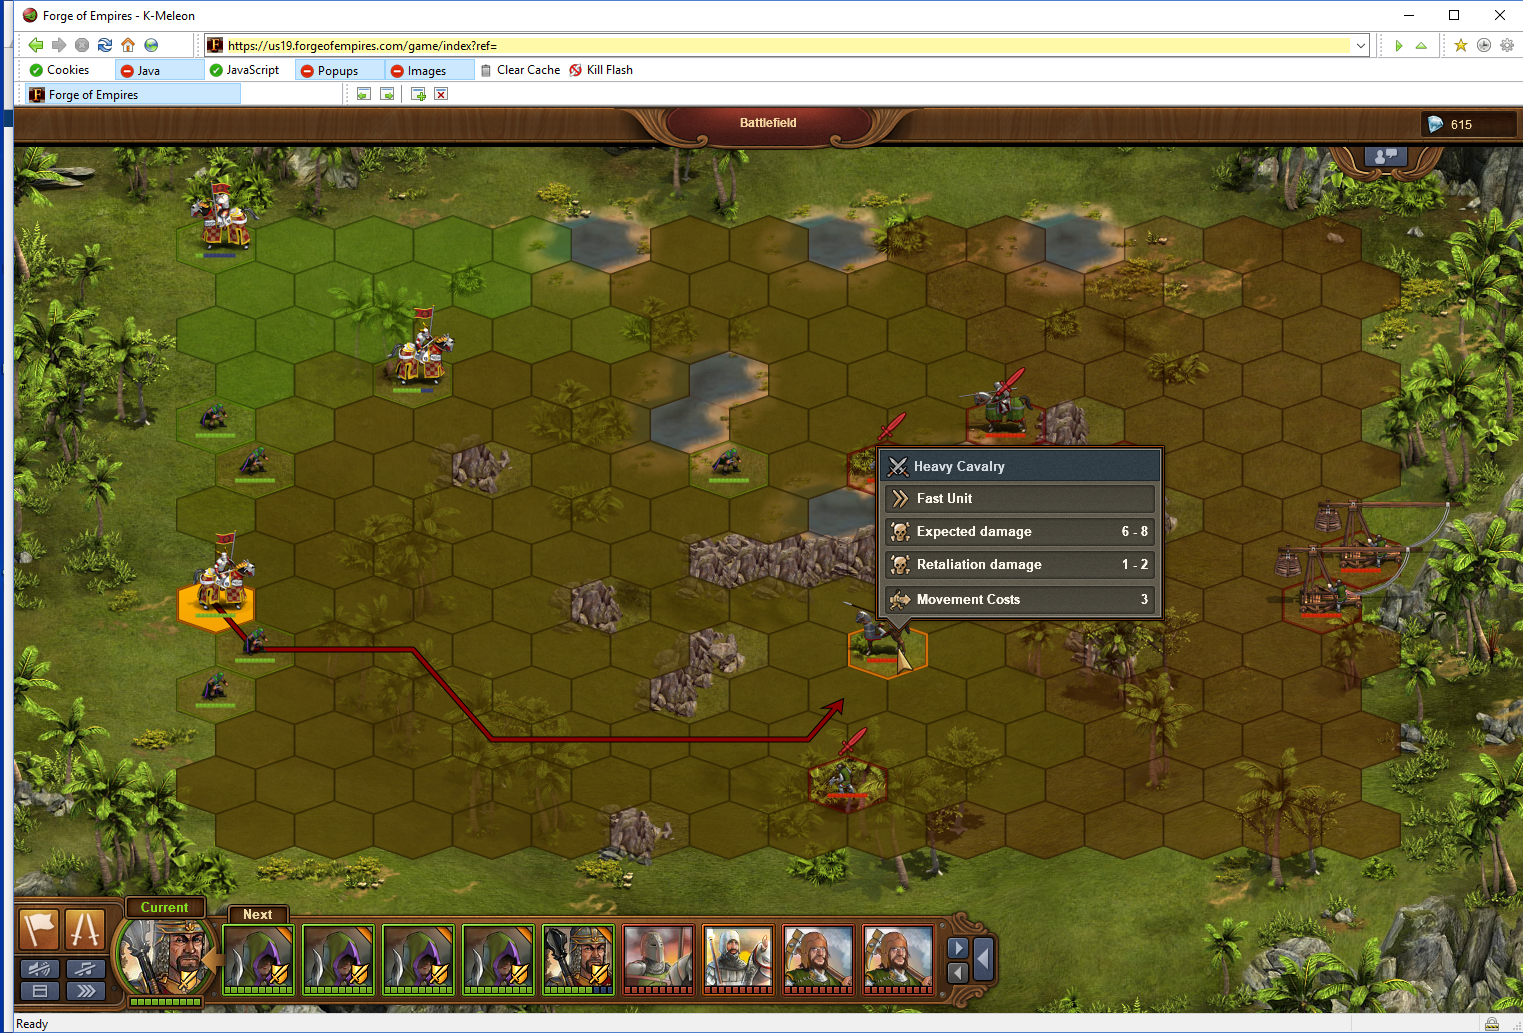
You can see that the trebs have converted 2 of the rogues into champs and all of the AI units have moved up except for the AI rogue. You want to look for an opportunity to take out an AI unit with the 2 hits that your converted rogues will have before the enemy moves again. Depending on which unit you go after, you may have a 3rd chance to hit if you include your seed champ. It’s better to go after 1 unit and remove it completely than to damage 2 units. That way, there will be 1 more rogue of yours available to absorb a blow. Since the AI rogue hasn’t moved as yet, check its range. You can see that there are 3 tiles outside the rogue’s range which are next to the AI light unit but only 1 tile outside the rogue’s range next to the AI heavy. This means you should target the light since you need to land 2 hits to take him out. In different battles, with more AI trebs, you may have more than 2 converted rogues. Let’s say you had 3 converted rogues. You’d be able to plan on taking out the light with 2 hits and make 1 hit on the heavy, knowing that your seed champ will have a shot at finishing off the heavy after the AI rogue moves. However, in this case, we’ll go for the AI light.

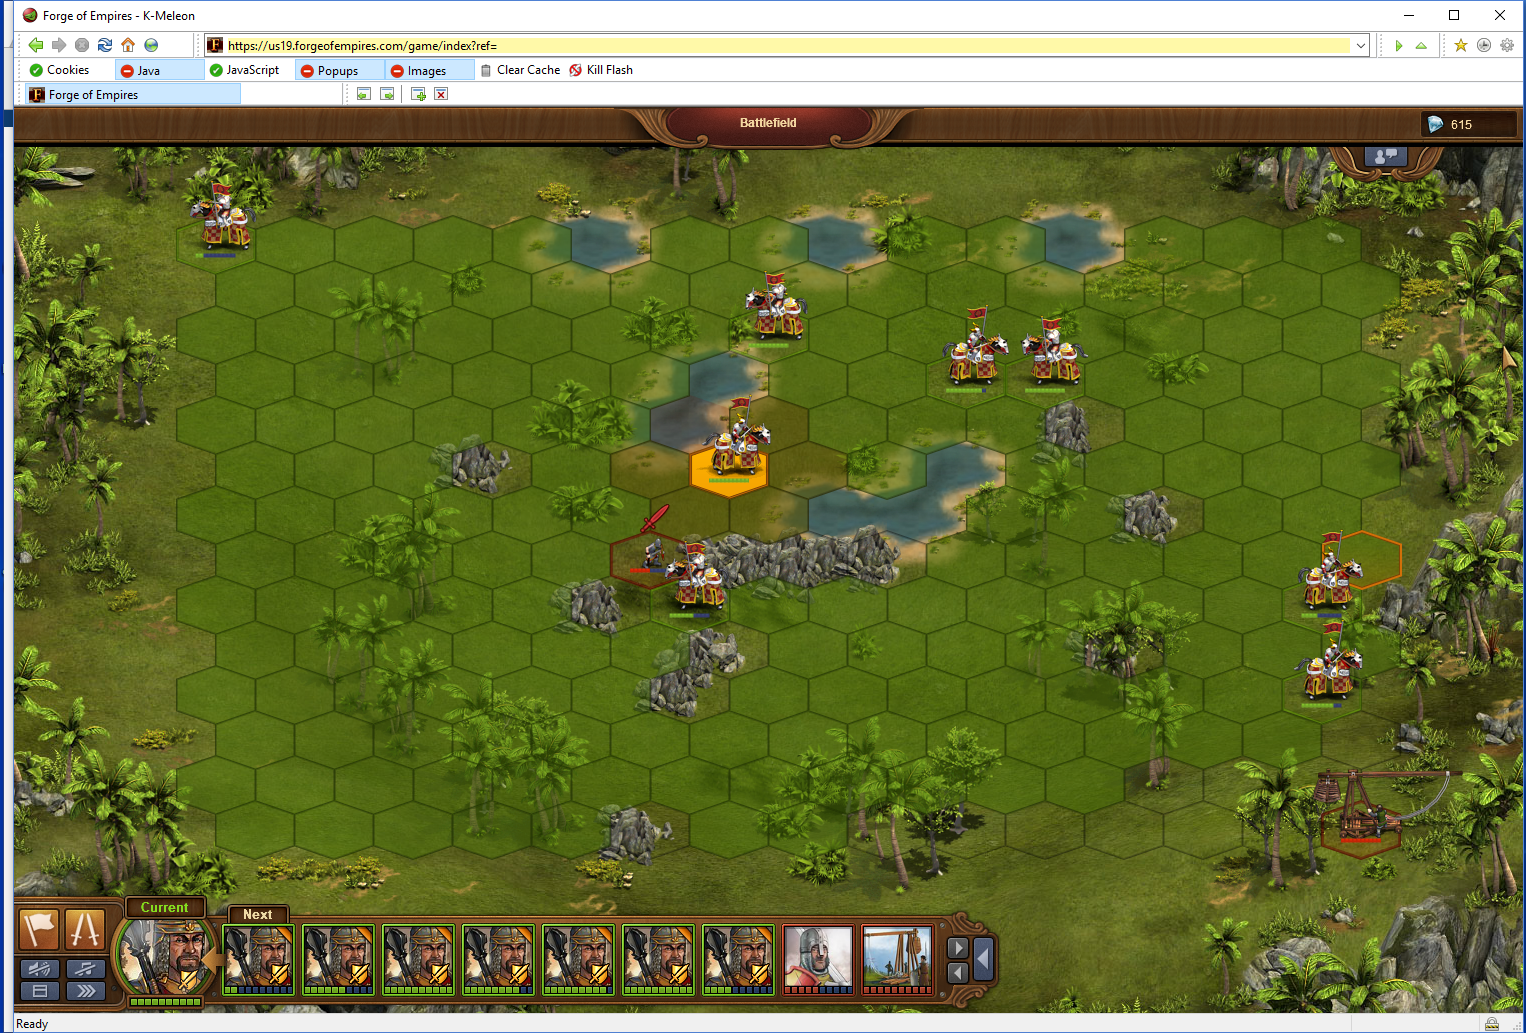
I moved up all rogues and took out the AI light. The AI rogue has moved up. Now we have to choose a target for our seed champ. There are 4 enemy melee, 3 of them will definitely be able to hit rogues and suffer the counterpunch. However, if the AI goes for the easternmost rogues first, the easternmost AI heavy may not be able to reach the last rogue. We have no control of that. If that happens, the AI heavy may go for the northernmost champ, which is already injured, and take him out. So, to minimize that chance, we’ll use the seed champ to weaken the AI heavy.

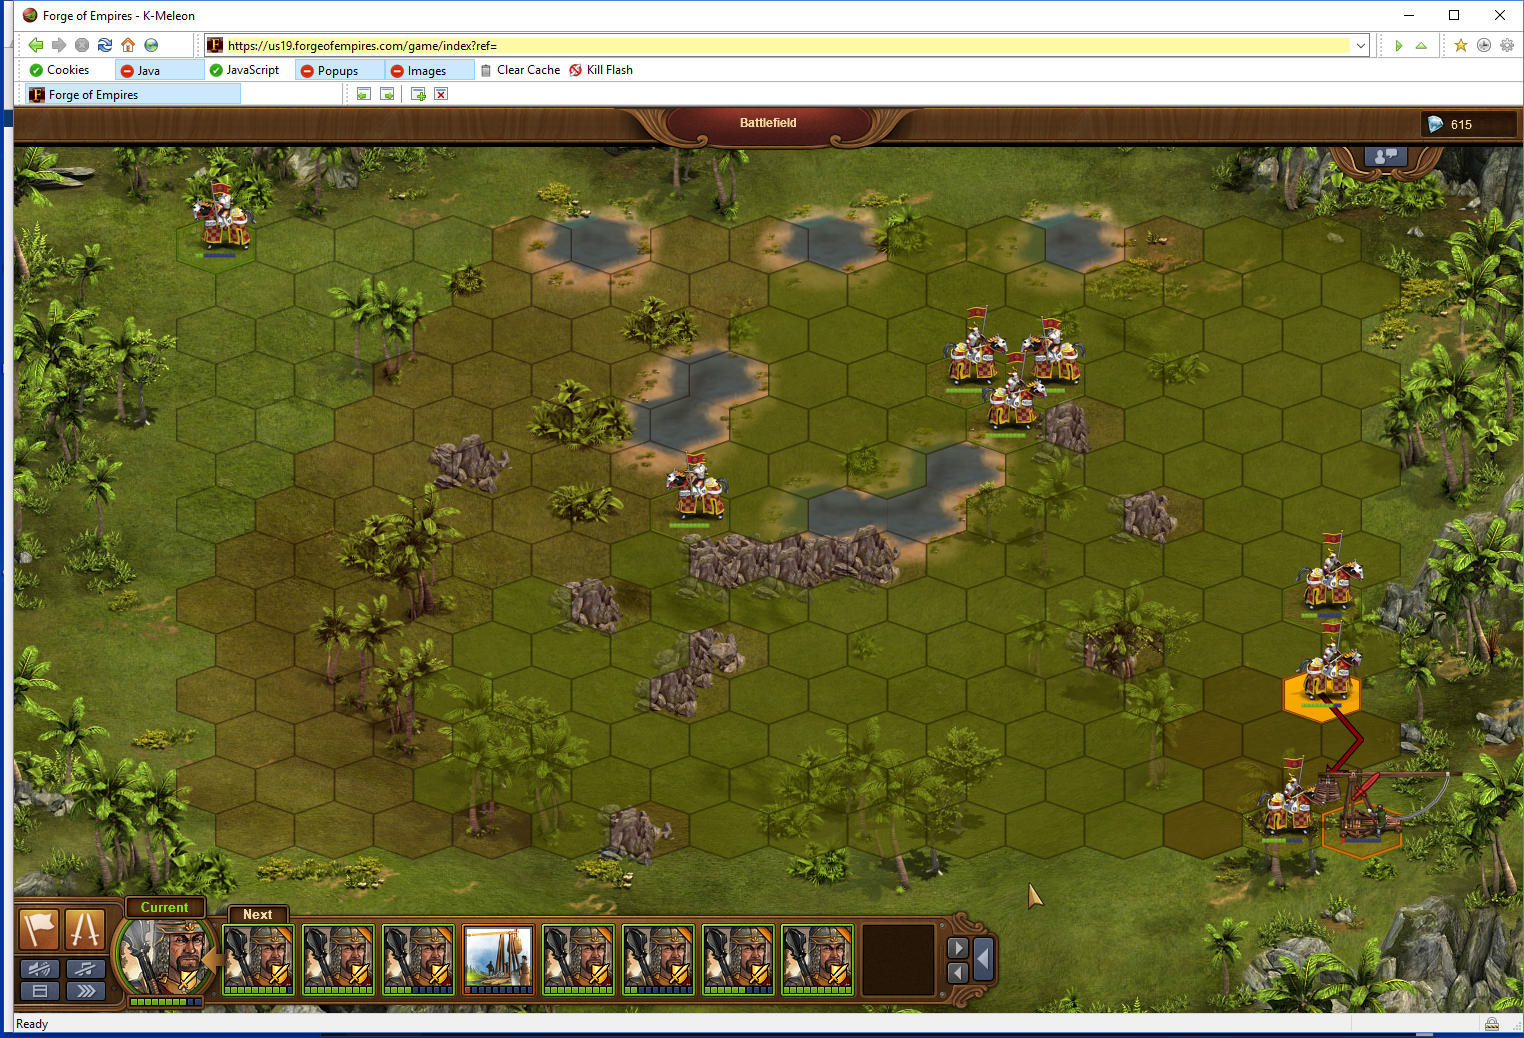
All remaining rogues were converted and the counterpunch has weakened the melee units. If we take them out before going after the AI rogue, it will convert into a treb which can be weakened before it strikes. The benefit of eliminating melee units while there are unconverted AI rogues is that there will be no counterpunch when we hit them. The downside is that if our units were really weak, it would be tougher to hide from AI range or artillery units. When taking out the melee units, use your most injured units to take out the weaker AI units.
All AI melee gone. Checking the unit listing at the bottom of the screen, we have 3 more hits before the rogue then the seed champ can move before the 2 AI trebs. We’ll go for the AI rogue, weaken it, then go for one of the AI trebs. Once your boost gets high enough, you will periodically take out uninjured AI trebs with one shot from a champ.
Choice between taking out the injured AI treb or injuring the healthy AI treb. As long as none of your units have 2 pips of health or less, it’s better to injure the healthy AI treb. That way, each of them will only inflict 1 pip each.

At this point, you can simply clean up the remaining AI units.
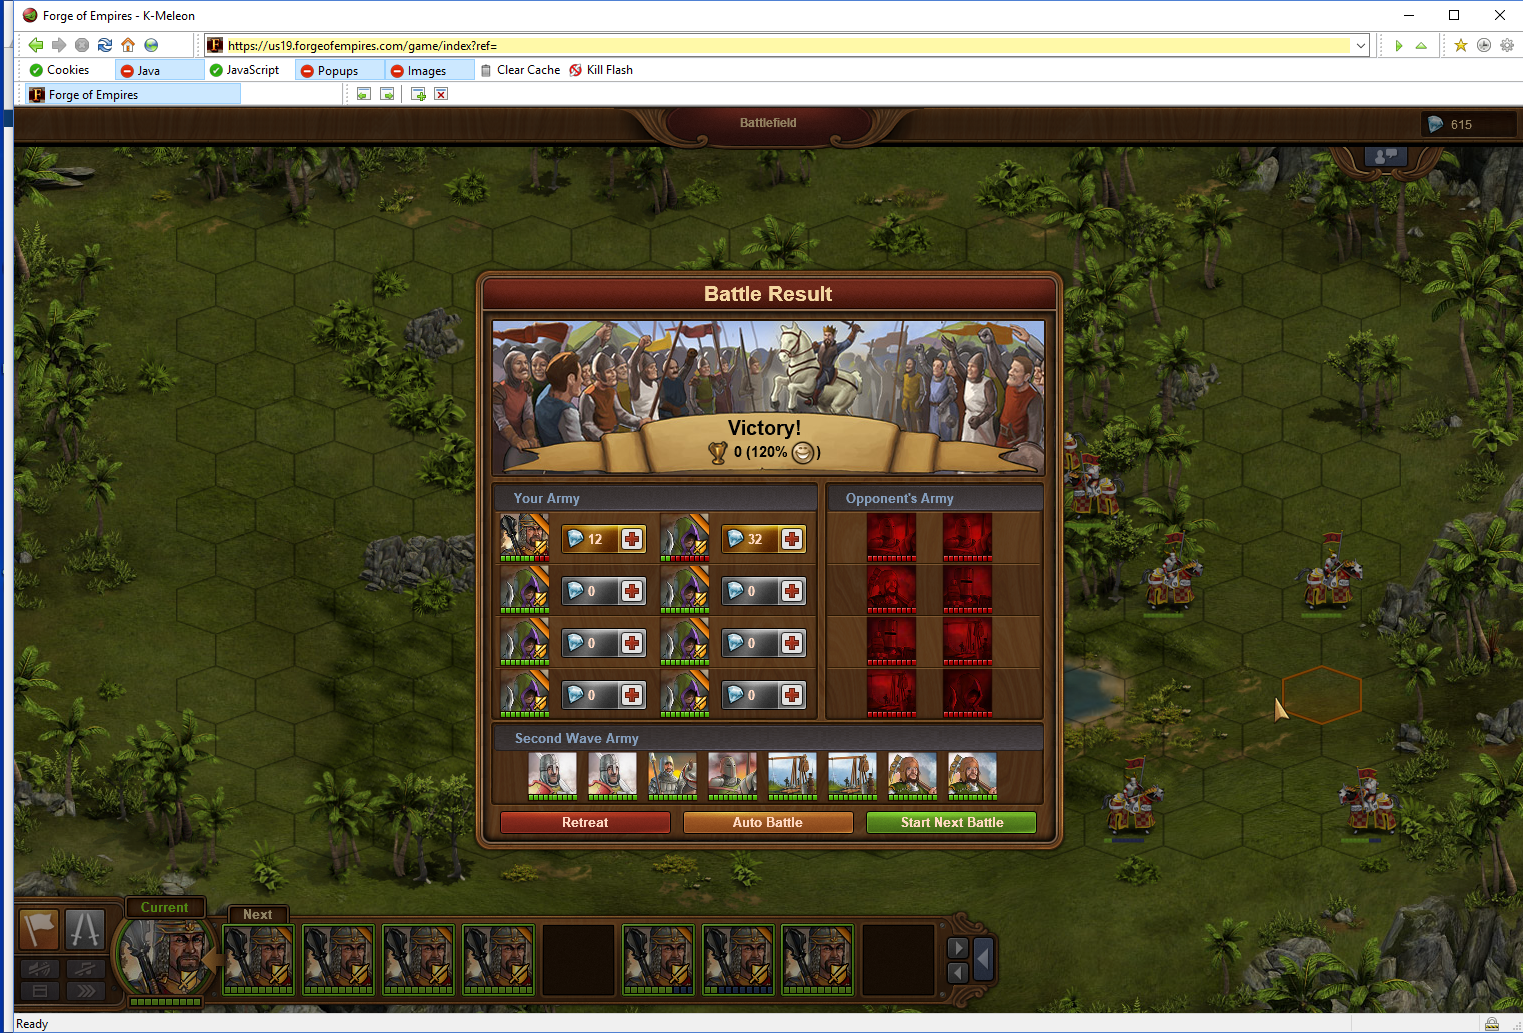
First wave done. Seed is in good shape and one badly injured rogue which needs to be protected.
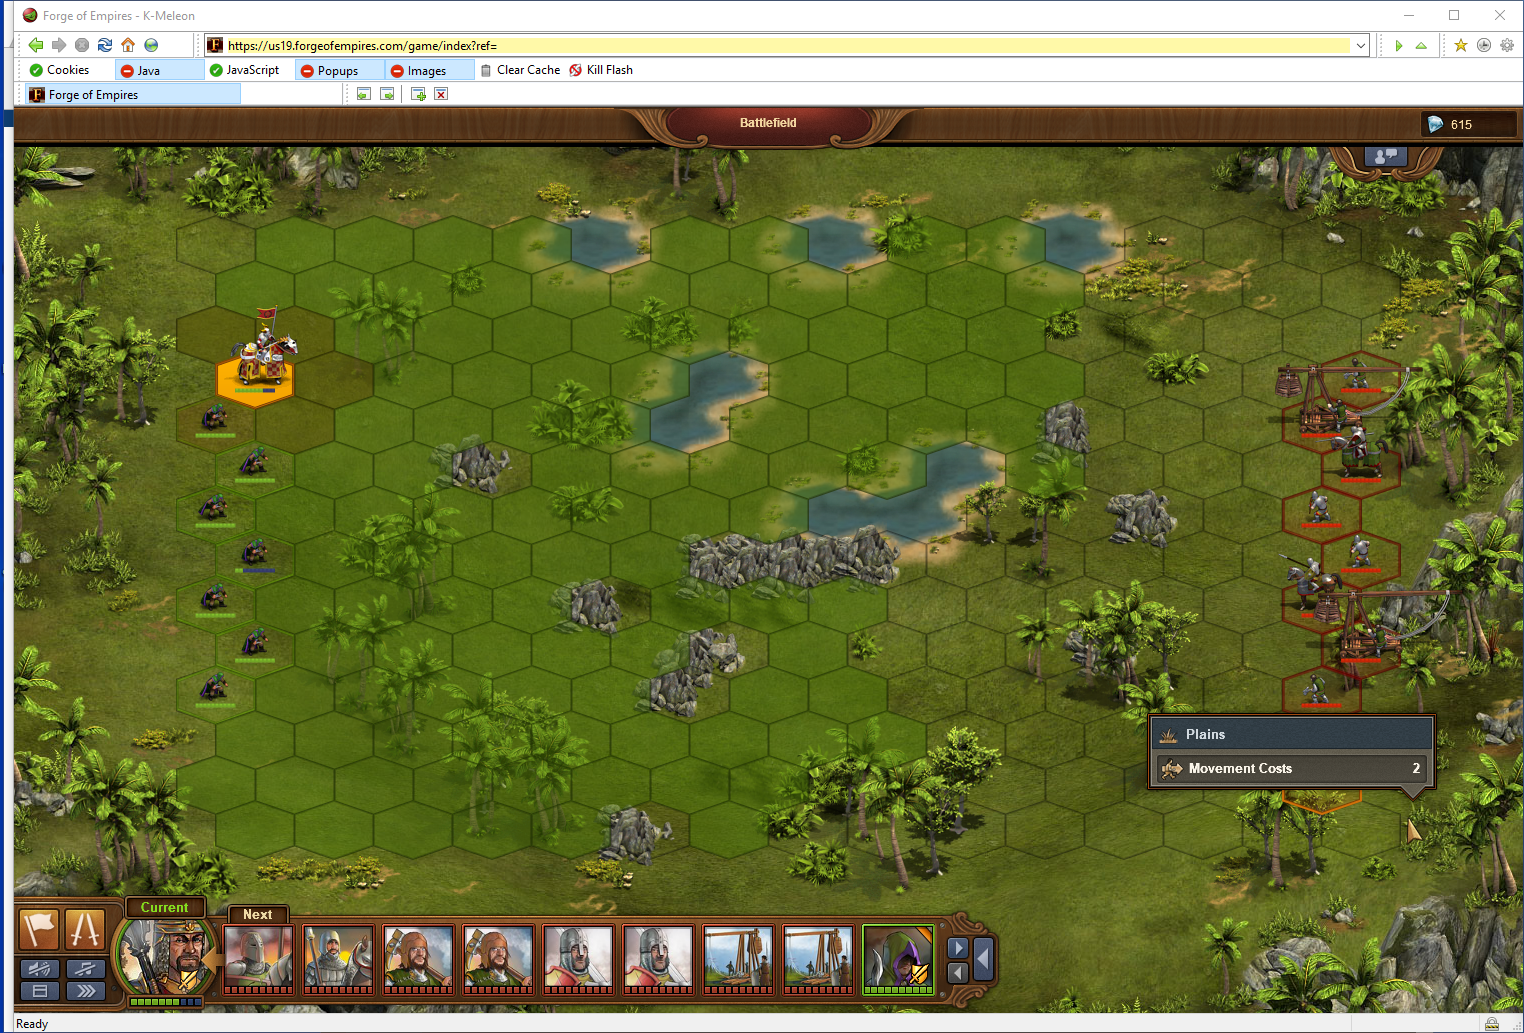
Similar approach to wave 1, except we need to protect the injured rogue.
Check the AI range so we can place the seed champ out of range of the non-trebs.

AI units have moved, 2 rogues were converted, including the injured rogue. Move up all the rogues into striking distance of the AI units.

Hide the injured champ in the corner or somewhere else out of range of the trebs. We will have 2 hits with our other champs, including the seed champ. Always check the unit listing to make sure you select an AI unit to target which will allow you to have 2 hits before it moves. Check both of your champs to confirm that they will have the range to hit your selected target. As before, better to eliminate one rather than injure two.
When selecting an AI target, try to select one which is in striking distance of your hidden unit. After checking the range of the lower AI cavalry unit, we can eliminate that as a choice because he can’t reach the hidden unit.

The AI units have moved, all but one of the AI melee are injured. We need to pick off the ones which can reach the hidden unit. We have to figure out how to either eliminate all units or survive the counterattack from the remaining units.

The only AI melee unit we can’t eliminate with one hit is the heavy. Our hidden unit is safe from the remaining AI units. Other than the hidden unit, all of our units can withstand the hit from the AI heavy and the AI trebs, except for one injured champ. Check the range of that heavy. Notice that there are safe spaces next to the AI trebs. We can target one of the AI trebs with the injured champ, which will also take it out of range of the AI heavy.
Use one or two of the healthy champs to take out the AI heavy.
Finish off the remaining AI unit(s).
Celebration time because we made it without losing any units. The injured units will heal. If you don’t have enough uninjured rogues to continue to battle, it’s a good indication that you need to level your traz and/or plan your town’s barracks so that rogue production will be favoured.
Recent Comments