Do you like to play Forge of Empires aggressively? Does it bring you pleasure when you see your enemy crushed with extreme prejudice by your troops? Do you want nothing more than to be ruthlessly aggressive with the best attack boost possible? You might be a fighter if that’s the case, and you’re in good company.
Fighting is a huge part of FoE. You’re encouraged to fight on the continent map, there’s Guild Expedition, GvG, and attacking the neighborhood (perhaps for points, perhaps for plunder). Everywhere you turn in this game you’re given chances to be a war-waging superpower of a player. Sure, you could negotiate with goods for a couple of those things, but it is clear that this game places some emphasis on fighting. It can be seen in the quests where your only option is to fight, and you’ll find these occasionally in the story line.
To be an effective fighter though, you need to have a decent attack boost. Attack boost is a percentage gain given to the units you’re using to attack with (which are different from the units you have set to defend your city). There are a few ways to earn this boost:
- Great Buildings
- Troop Barracks
- Event Buildings
- Set Buildings
- Settlements Rewards
- Tavern Shop
- Potions
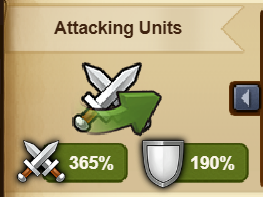 There are two parts to the attack boost. A bonus to attack when you’re attacking, and a bonus to the defense for your attackers. It’s great to be able to hit hard (and with the bonus of Arctic Orangery, sometimes Hulk smash your opponents with a one-hit kill), but none of that means a thing if you can’t also withstand your opponents attacks to survive to hit. Especially since damaged units do not deliver as much damage, and the more damage you’ve taken the greater hit you take on what you can do for an attack. So minimizing damage to yourself can be pretty crucial, and the higher you go in age the more important this becomes. With AR targeting in Space Age: Mars, this becomes almost paramount. To check on what your boost is, head on into your town hall. There will be a “Boost Overview” section where you can then check out what your boost is, and where it’s coming from.
Great Buildings
Presently, GBs are the only way to get the defensive portion of your attack boost. While everything else will increase how hard you can hit, GBs are the only way to get the boost that you’ll need to withstand an attack. Bare minimum you will want to get all pertinent GBs to level 10, but after that you should consider taking them above and beyond to be more effective in later eras beyond CE. How much boost you get per level is going to be dependent on the specific GB you’re raising, and the era of the GB will determine how difficult (ie: expensive) it is to raise it. Currently the GBs that give these boosts are:
- Zeus, 30% at Level 10 (Bronze Age)
- Cathedral of Aachen, 30% at Level 10 (Early Middle Ages)
- Castle del Monte, 30% at Level 10 (Late Middle Ages)
- Terracotta Army, 20% at Level 10 (Virtual Future)
Troop Barracks
When you reach Contemporary Era you will encounter your first regular troop barrack that has an attack boost attached to it. This will become a fairly regular occurrence up through the eras from here forward, and it makes it hard not to keep those racks down… even when you don’t need them anymore. There is only one special troop barrack outside of the eras that provides attack boost, and that’s the Drummer School (for 4%). You can get a Drummer School from events if you’re lucky, or purchase one from the Antique’s Dealer. These troops aren’t super useful though beyond early era fighting (for the most part), so it’s not really something you want to have down for long periods of time, either.
Event and Set Buildings
As time has gone on and the game has progressed through the eras, with troops getting more brutal to face and GE being the bear that it is in Tier 4, Inno has realized that attack boost is pretty crucial (or at least that players want it anyways) and have been releasing buildings with a bit more frequency that have an attack boost associated with them. These buildings are all first seen through events, and some can be won through Daily Quests or purchased/bid on at the Antique Dealer. Using the fan-based wiki page to look ahead at event prizes and scope out what’s good and what’s not will help a lot with knowing if you need to push hard to obtain something specific, use patience to wait for a prize to come up, etc.; because without a doubt the easiest way to get the good stuff is to earn it during the event rather than testing your luck to get it later. This is especially true of set buildings, where you need to earn multiple pieces to get the full effect. They can be a struggle to obtain, but are usually well worth your efforts.
Settlements Rewards
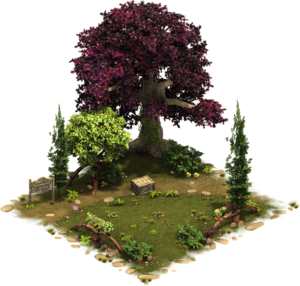
With the release of the Farmville-esq settlements we have seen the release of special buildings that are too good to pass up… which is Inno’s way of forcing you to play the farmer when all you want to do is play the pillager. Settlements take a lot of work to complete, and you have to do them over and over and over and over and over again to get all the upgrades you’ll need to obtain the best stuff. If this isn’t an exercise in extreme patience for a game, then I’d hate to see what is. It’s true that this game is a marathon, not a sprint, but settlements truly do have a monotonous quality that just drags. Unfortunately, as stated before, the goodies are way too good to pass up so buckle up, it’s gonna be a long ride. Just look at Yggdrasil and tell me you’re not coveting it (you’d be lying to me if you tell me you aren’t).
Tavern Shop & Potions
When in doubt, liquid courage is the way to go! If you’re in need of just a little extra push you can spend some tavern silver for a temporary boost. The length and percentage of the boost will depend entirely on how much you’re willing to spend. Right now you can get a 10% boost for 30min, 20% boost for 4hr, or a 30% boost for 24hr (note: this is after your tavern is fully upgraded as far as chairs go). If you’re hardcore for GvG, or even Tier 4 GE, remember that a tavern boost can save a rogue’s life… for now. You’ll probably kill them later.
Similar to the tavern shop are potions, which you can win from quests and events. They all last 8hrs, and come in 5%, 10%, and 20% options. While you cannot stack two or more of the same potion on top of each other, you could use one of each all at the same time for a 35% boost for 8hrs. That’s not too bad. They are difficult to get though because it is totally random, so these are something that might be best kept for when the going gets really tough.
So What’s Worth the Space?
This is the biggest issue for anyone, regardless of play style: space. You’re only allotted so much of it, and there are a lot of really cool things out there to enhance what you want to do. The trick comes in determining what will serve your needs the best. When you’re building for your play style and something is hard to get (like attack boost), you often want to put in multiples of items when you get them. The question though is should you? When it comes to each item, it’s important to consider how much you end up getting per square occupied, to know its efficiency. The chart below will help you with that when it comes to these items. Note however that for many of these attack boost isn’t the only thing you get, so it might not be efficient for the attack boost alone but it’s very efficient for something else you need, like FPs.
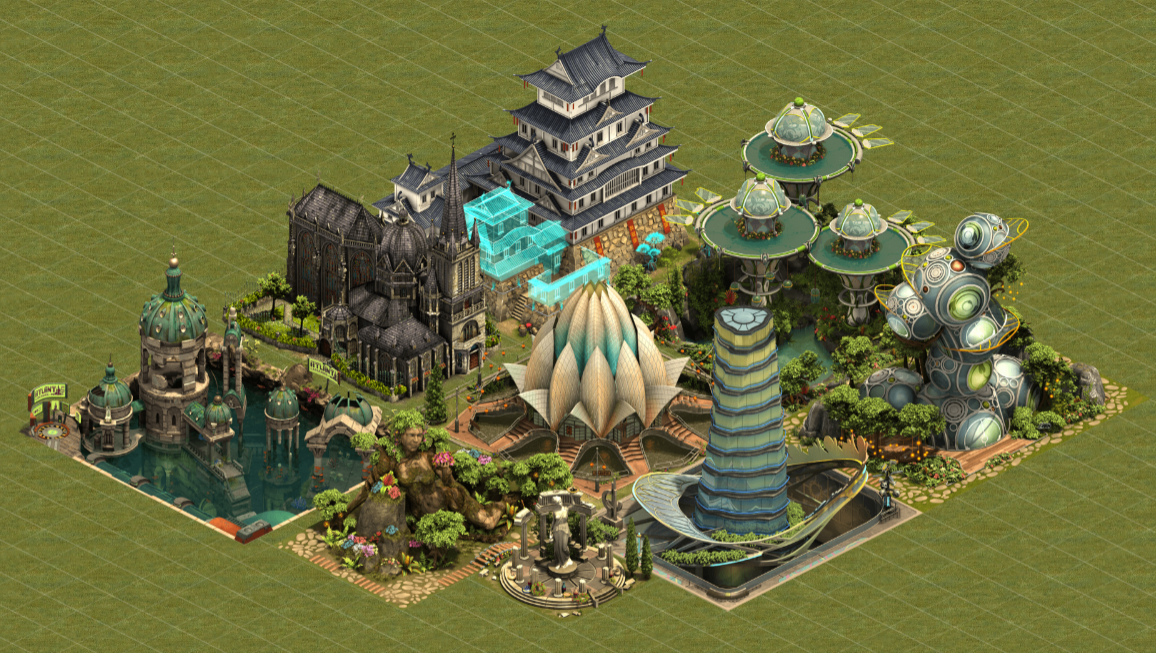
Gallery of Specialty Buildings
These are the special buildings that give attack boost, which a quick note if they come from somewhere special (such as a final upgrade option).
-

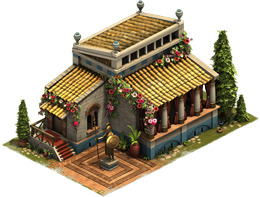
- Altar of Artemis, final upgrade for the Altar Garden

-

- Appleton Cottage, final upgrade for the September Cottage

-

- Botanical Rotunda

-

- Carousel

-

- Checkmate Square

-

- Colossus

-

- Contestants’ Estate
-

- Fire Pagoda, final upgrade option for the Pagoda

-

- Greater Runestone, gained by completing the Viking Settlement before the timer runs out.

-
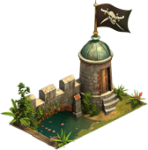
- Pirate Guard Post, from a guard post selection kit.

-

- Pirate Ship, final upgrade choice from The Ship

-

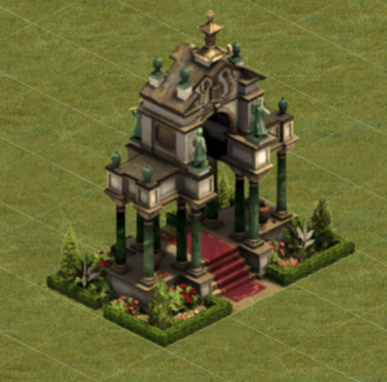
- Royal Marble Gateway
-

- Speaker’s Corner
-

- Winners’ Plaza

-

- Yggdrasil, upgrade item earned for completing Viking Settlements

-

- Cherry Garden Set Level 1

-

- Cherry Garden Set Level 2

-

- Classical Garden Set

-

- Indian Fountain Set

-

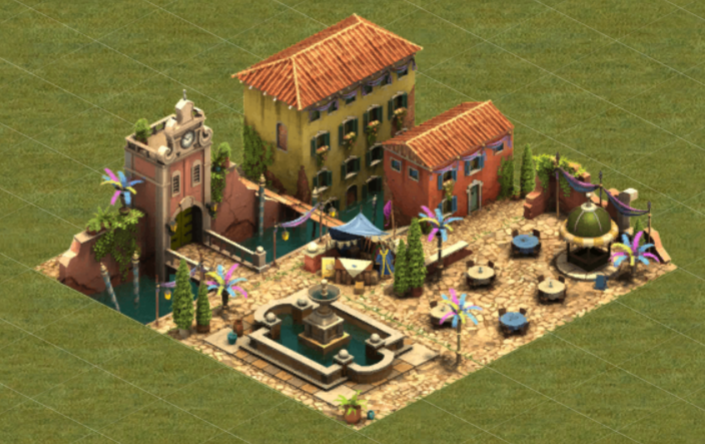
- Piazza Set Level 1
-

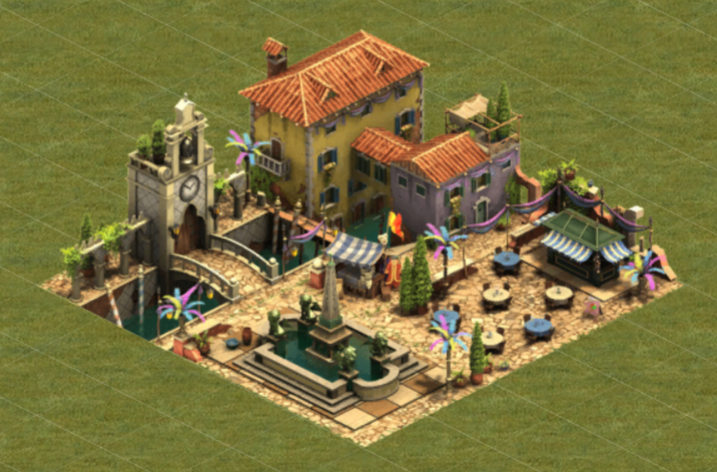
- Piazza Set Level 2
-

- Winter Village Set where you can earn Attack Boost
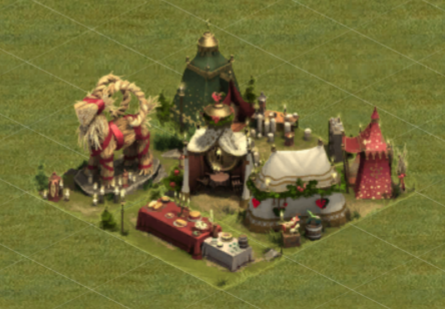
Table of Special Items
This table has all the items that give attack boost, broken down with how much you get for the space occupied. You are able to sort the table at your leisure in a few different ways, as well as search the table for any of the the items shown in the gallery if you need to see that specifically. Searching the table is recommended if you’re looking for a specific building, especially since many of them are era-dependent on how much boost they will give.
| Building/Set | Level/Era | Attack Boost | Size | Boost/ Square |
|---|---|---|---|---|
| Altar of Artemis | BA | 3% | 3x2 | 0.5 |
| Altar of Artemis | IA-CA | 4% | 3x2 | 0.67 |
| Altar of Artemis | IE-CE | 5% | 3x2 | 0.83 |
| Altar of Artemis | TE-VF | 6% | 3x2 | 1 |
| Altar of Artemis | SAM | 7% | 3x2 | 1.17 |
| Botanical Rotunda | BA-EMA | 5% | 3x3 | 0.56 |
| Botanical Rotunda | HMA-CA | 6% | 3x3 | 0.67 |
| Botanical Rotunda | IE-ME | 7% | 3x3 | 0.78 |
| Botanical Rotunda | PME-TE | 8% | 3x3 | 0.89 |
| Botanical Rotunda | FE-OF | 9% | 3x3 | 1 |
| Botanical Rotunda | VF-SAM | 10% | 3x3 | 1.11 |
| Carousel | BA-HMA | 4% | 3x3 | 0.44 |
| Carousel | LMA-PE | 5% | 3x3 | 0.56 |
| Carousel | ME-TE | 6% | 3x3 | 0.67 |
| Carousel | FE-VF | 7% | 3x3 | 0.78 |
| Carousel | SAM | 8% | 3x3 | 0.89 |
| Checkmate Square | BA-IA | 5% | 3x3 | 0.56 |
| Checkmate Square | EMA-LMA | 6% | 3x3 | 0.67 |
| Checkmate Square | CA-PE | 7% | 3x3 | 0.78 |
| Checkmate Square | ME-CE | 8% | 3x3 | 0.89 |
| Checkmate Square | TE-AF | 9% | 3x3 | 1 |
| Checkmate Square | OF-SAM | 10% | 3x3 | 1.11 |
| Cherry Garden Set | Level 1 | 5% | 5x5 | 0.2 |
| Cherry Garden Set | Level 2 | 10% | 5x5 | 0.4 |
| Classical Garden Set | N/A | 5% | 4x4 | 0.31 |
| Colossus Level 4-8 | BA-IA | 3% | 4x4 | 0.19 |
| Colossus Level 4-8 | EMA-HMA | 4% | 4x4 | 0.25 |
| Colossus Level 4-8 | LMA-CA | 5% | 4x4 | 0.31 |
| Colossus Level 4-8 | IE-PE | 6% | 4x4 | 0.38 |
| Colossus Level 4-8 | ME-PME | 7% | 4x4 | 0.44 |
| Colossus Level 4-8 | CE-TE | 8% | 4x4 | 0.5 |
| Colossus Level 4-8 | FE-AF | 9% | 4x4 | 0.56 |
| Colossus Level 4-8 | OF-VF | 10% | 4x4 | 0.63 |
| Colossus Level 4-8 | SAM | 11% | 4x4 | 0.69 |
| Colossus Levels 9-10 | BA-IA | 7% | 4x4 | 0.44 |
| Colossus Levels 9-10 | EMA-HMA | 8% | 4x4 | 0.5 |
| Colossus Levels 9-10 | LMA-CA | 9% | 4x4 | 0.56 |
| Colossus Levels 9-10 | IE-PE | 10% | 4x4 | 0.63 |
| Colossus Levels 9-10 | ME-PME | 11% | 4x4 | 0.69 |
| Colossus Levels 9-10 | CE-TE | 12% | 4x4 | 0.75 |
| Colossus Levels 9-10 | FE-AF | 13% | 4x4 | 0.81 |
| Colossus Levels 9-10 | OF-VF | 14% | 4x4 | 0.83 |
| Colossus Levels 9-10 | SAM | 15% | 4x4 | 0.94 |
| Contestants' Estate | N/A | 3% | 3x2 | 0.5 |
| Fire Pagoda | BA-IA | 6% | 4x4 | 0.38 |
| Fire Pagoda | EMA-HMA | 7% | 4x4 | 0.44 |
| Fire Pagoda | LMA-CA | 8% | 4x4 | 0.5 |
| Fire Pagoda | IE-PE | 9% | 4x4 | 0.56 |
| Fire Pagoda | ME-CE | 10% | 4x4 | 0.63 |
| Fire Pagoda | TE-AF | 11% | 4x4 | 0.69 |
| Fire Pagoda | OF-SAM | 12% | 4x4 | 0.75 |
| Greater Runestone | Levels 4-5 | 2% | 2x2 | 0.5 |
| Indian Fountain Set | BA-EMA | 2% | 4x6 | 0.08 |
| Indian Fountain Set | HMA-CA | 3% | 4x6 | 0.13 |
| Indian Fountain Set | IE-PE | 4% | 4x6 | 0.16 |
| Indian Fountain Set | ME-PME | 5% | 4x6 | 0.21 |
| Indian Fountain Set | CE-TE | 6% | 4x6 | 0.25 |
| Indian Fountain Set | FE-AF | 7% | 4x6 | 0.29 |
| Indian Fountain Set | OF-VF | 8% | 4x6 | 0.33 |
| Indian Fountain Set | SAM | 9% | 4x6 | 0.38 |
| Piazza Set Level 1 | BA-EMA | 2% | 5x5 | 0.08 |
| Piazza Set Level 1 | HMA-CA | 3% | 5x5 | 0.12 |
| Piazza Set Level 1 | IE-ME | 4% | 5x5 | 0.16 |
| Piazza Set Level 1 | PME-TE | 5% | 5x5 | 0.2 |
| Piazza Set Level 1 | FE-OF | 6% | 5x5 | 0.24 |
| Piazza Set Level 1 | VF-SAM | 7% | 5x5 | 0.28 |
| Piazza Set Level 2 | BA-EMA | 4% | 5x5 | 0.16 |
| Piazza Set Level 2 | HMA-CA | 5% | 5x5 | 0.2 |
| Piazza Set Level 2 | IE-ME | 6% | 5x5 | 0.24 |
| Piazza Set Level 2 | PME-TE | 7% | 5x5 | 0.28 |
| Piazza Set Level 2 | FE-OF | 8% | 5x5 | 0.32 |
| Piazza Set Level 2 | VF-SAM | 9% | 5x5 | 0.36 |
| Pirate Guard Post | BA-PME | 1% | 1x2 | 0.5 |
| Pirate Guard Post | CE-SAM | 2% | 1x2 | 1 |
| Pirate Ship | N/A | 8% | 7x3 | 0.38 |
| Royal Marble Gateway | BA-EMA | 2% | 2x3 | 0.33 |
| Royal Marble Gateway | HMA-CA | 3% | 2x3 | 0.5 |
| Royal Marble Gateway | IE-ME | 4% | 2x3 | 0.67 |
| Royal Marble Gateway | PME-TE | 5% | 2x3 | 0.83 |
| Royal Marble Gateway | FE-OF | 6% | 2x3 | 1 |
| Royal Marble Gateway | VF-SAM | 7% | 2x3 | 1.17 |
| Speaker's Corner | BA-IA | 5% | 3x3 | 0.56 |
| Speaker's Corner | EMA-LMA | 6% | 3x3 | 0.67 |
| Speaker's Corner | CA-PE | 7% | 3x3 | 0.78 |
| Speaker's Corner | ME-CE | 8% | 3x3 | 0.89 |
| Speaker's Corner | TE-AF | 9% | 3x3 | 1 |
| Speaker's Corner | OF-SAM | 10% | 3x3 | 1.11 |
| The Appleton Cottage | BA-IA | 5% | 3x4 | 0.42 |
| The Appleton Cottage | EMA-HMA | 6% | 3x4 | 0.5 |
| The Appleton Cottage | LMA-CA | 7% | 3x4 | 0.58 |
| The Appleton Cottage | IE-PE | 8% | 3x4 | 0.67 |
| The Appleton Cottage | ME-PME | 9% | 3x4 | 0.75 |
| The Appleton Cottage | CE-TE | 10% | 3x4 | 0.83 |
| The Appleton Cottage | FE-AF | 11% | 3x4 | 0.92 |
| The Appleton Cottage | OF-VF | 12% | 3x4 | 1 |
| The Appleton Cottage | SAM | 13% | 3x4 | 1.08 |
| Winners' Plaza | BA-LMA | 2% | 3x3 | 0.22 |
| Winners' Plaza | CA-PME | 3% | 3x3 | 0.33 |
| Winners' Plaza | CE-OF | 4% | 3x3 | 0.44 |
| Winners' Plaza | VF | 5% | 3x3 | 0.56 |
| Winners' Plaza | SAM | 6% | 3x3 | 0.67 |
| Winter Village Set | N/A | 3% | Varies | Varies |
| Yggdrasil | Levels 1-2 | 6% | 3x3 | 0.67 |
| Yggdrasil | Levels 3-4 | 12% | 3x3 | 1.33 |
| Yggdrasil | Levels 5-6 | 18% | 3x3 | 2 |
| Yggdrasil | Levels 7-8 | 24% | 3x3 | 2.67 |
| Yggdrasil | Level 9 | 30% | 3x3 | 3.33 |

Saknika, once again an awesome article and great guide for our guild mates to follow, so they have fun and succeed to the best of their abilities. We are blessed to have you as a leader.
Happy to do it Mike. 🙂